| ....................MARTIN WING ASSEMBLY PAGE............... |
| .........................28 STEP WING ASSEMBLY .................. |
NOTE: MARTIN WING OR MARTIN FEATHER . The difference between building a Martin Wing and a Martin Feather is a lighter wing, approximately a 4 OZ difference. The Martin Feather has smaller Elevons and "does not" use any addition tape. The only tape used is for hinges to mount the elevons, the electronic cover and to secure the tiplets to the elevons. The Martin Wing with it's reinforced tape is much stronger and can be used for combat and higher winds.
|
| .....CUSTOMER TESTIMONY ON BUILDING THEIR MARTIN WINGS |
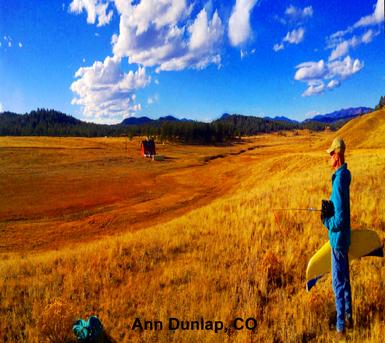
Testimony about building a Martin Wing, From Ann Dunlap of Colorado
Hello Everyone,
I would like to share my experience of building my Martin Wing.
When I first started looking into RC gliders I liked the idea of just buying one ready-made, because I wanted to get started as soon as possible. When I saw the Martin Wing ad. in the Hang Gliding/Paragliding Magazine, I was curious and looked up the website. Build my own RC glider... hmmm. Then I looked at the assembly instructions; that seems like a lot of steps, but George reassured in his description that it was a relatively quick build.
Eventually I got in touch with George about buying a kit and what all was involved. I was nervous and reluctant at first about building my Martin Wing because I had never made an aircraft before (not even a model airplane). I was even tempted to let George build it for me, but he pointed out that if I built it myself it would be uniquely mine; like a painting or sculpture containing the soul of the artist...
I decided I wanted the satisfaction and (if it worked) the pride of building it myself. So after reading through all of the instructions, it seemed very straight forward and doable. George helped me with any questions I had and even did a few of the more (seemingly) complicated steps for me to make the building experience as fun as possible. ( These steps will also be done for you.) I gathered all the recommended materials together (glue, tools etc.) and when my Martin arrived I put it on the kitchen table with the step-by-step instructions on my computer, and got started. It was about 9am when I started and I was determined to get as much of it done in one day as I could. Building my Martin was not as hard as I thought it was going to be. It got to be more fun as I saw it coming together and motivated me to finish. I took a break around 3:30 for a few hours, and got started on it again around 7pm and had most of it finished by 10pm; just the glue for the ballast needed to cure (a total of about 9 hours). I started flying it the following day. ANN DUNLAP
See Ann fly her Martin Wing on the Your Video Page!
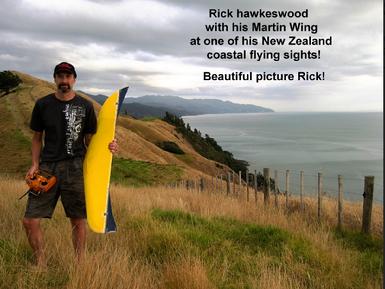
Rick Hawkeswood writes "George,
I'm really enjoying the build
regards,
Rick ( New Zealand )
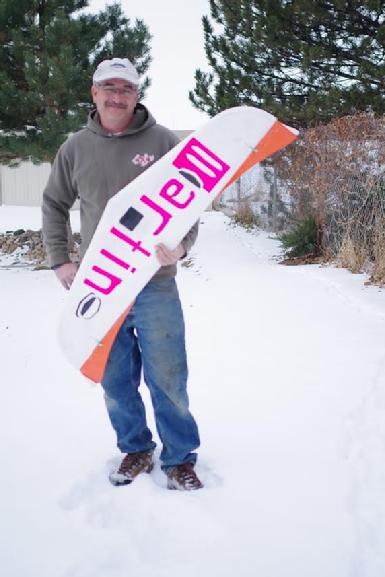
Testimony from Ted Fraughton
Ted ( Intermountain Silent Flyers Flight Instructor, Point of the Mountain Utah)
George emailed me a few months back stating he would like to get some of his Martin Wings flying out here in the west. We visited on the phone for a while to determine which type of kit would be best suited for my particular needs. I live about ten minutes from the Point of The Mountain State Park in Utah. One of the premier slopes in the whole U.S. I am involved in our local R.C. Glider club and have been an instructor for several years. George wanted me to do a build and see what I think of the Martin Wing. He sent me a kit strait away and the build began.
After building this kit I was very impressed with how well it all went together. This was by far the easiest slope glider I have ever assembled. The kit took me Approx 10 to 12 hrs to assemble. I must add here that I did make some modifications to better fit our extreme environment. Winds at the point generally range from 15-30 M.P.H. Velocities. Gust of 40-50 M.P.H. are not uncommon. I wanted to build it with wide range of applicable conditions and yet suitable for training new pilots.
The goal was to have a Martin wing anyone could fly with whatever conditions exist. The modifications included, hardwood trailing edge, Ballast system to add weight on the big days, Modified control linkages and horns. Elevon reinforcement, etc.
There is however a price for all this as in the end it turned pretty heavy over a stock build. Never the less by comparison it is lighter than our typical sloper with the same wing span. These additional modifications did add significantly to the overall build time.
My guess if I were to do a totally stock total build, assembly would be in the 6-8 hr range not including glue dry time.
The directions are informative and very concise. Do not be discouraged by the length and depth George has put into these plans. He has covered every part well. I simply referred to his manual looked and the pictures to answer any questions. The true beauty of how he put all this together amazed me. Simply look for the thumbnail photo of the area you want covered, look at the segment and you are ready to move forward. Thankfully George is always so happy and able to answer any and all questions that arise.
One last thing to do is maiden this baby, With the highs here in the 20's during the day it is holding me at bay. The first break we get I will be letting her go. I can't wait. This looks to be an outstanding addition to my arsenal. Flight report to follow. If you ever get out here to the Point of The mountain here in Utah we will get you some air time with the Martin Wing.
Thanks again George.
--
| |
|
|
| ...............DETAILED ASSEMBLY INSTRUCTIONS |
IMPORTANT PLEASE READ
The "DETAILED ASSEMBLY INSTRUCTIONS" below show how I personally go about building my own Martin Wing. When I say detailed I mean detailed. From the way I apply my glue to cutting my tape. Any questions that you may have on the "28 STEP ASSEMBLY" can be answered by simply scrolling through the detailed steps until you come to the step that you are at above. Note: The steps in the detailed instructions will have a different step # but will describe in excessive detail what ever step your at in the 28 step procedure. ALSO steps that I have finished for you are marked "DONE".
|
|